One backpack and one suitcase: that's all I had when I moved from the US to Europe. All my stuff had to fit in two bags, and after a careful selection of what I really needed, everything else had to stay behind.
Among the stuff that didn't make it with me was all my darkroom equipment. But after 3 months of shooting almost exclusively digital, I was missing my Bronica so much that last week I finally pulled the trigger and bought everything I need to develop film at home... again.
This is a list of all the stuff I bought. You can use it as a checklist if you are building your own darkroom, although you might find you need more -or fewer- items than these.
I've also created a list on Amazon just in case you want to purchase any of these products over there: building a darkroom to develop B&W film at home.
Paterson developing tank (and reels)
The first thing you will need to start developing film at home is a developing tank, where you'll load your film and pour in the chemicals.
I only have experience with Paterson tanks, so that's why I bought it again. In the US, I had two: a small one that fit 1 roll of 120 film -or 2 rolls of 35mm- and a bigger one that fit 2 rolls of 120 -or 3 rolls of 35mm-.
The big tank was very useful during my road trip, since I was shooting so much. Developing two rolls at the same time will effectively save you a lot of time if you shoot a lot.
For now, I've decided to go with the small one. I can always upgrade -again- later.
- Small Paterson tank with 2 reels ($33)
- Big Paterson tank (it doesn't include reels) ($41)
Changing bag
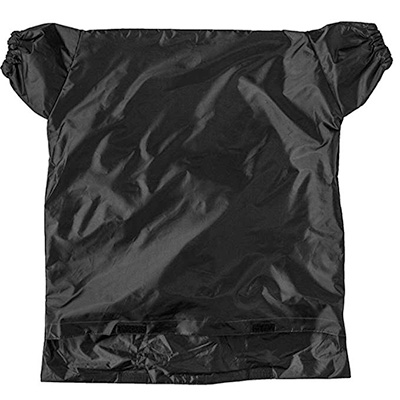
Loading the exposed film in the developing tank must be done in total darkness. If you are like me and don't have a spare room for this purpose, you need a changing bag.
The idea is to load the film inside the bag, passing your hands through two holes. No light will reach the inside of the bag, thus it will not ruin your film.
There are plenty of different changing bags available, but I'm going to recommend the one I used in the US: HIKA changing bag ($25). It fits both the small and big Paterson tanks, and you'll have plenty of room to handle the rolls inside the bag.
Measuring cups (optional: syringe)
Once the film is loaded in the tank, we need to get the chemicals ready. I use a couple of measuring cups for this, so both the developer and the fixer will always be ready and at the right temperature (I adjust the temperature before starting the development).
Almost any measuring cup will work for this. I bought these for $7, but you might already have some old ones at home that you can re-purpose for developing your film (just remember that you can't use these cups for cooking anymore!!!).
Depending on the developer you are using, you might need a way to measure very precisely and in small quantities. I started with Kodak D76 and used a dilution of 1+1, so for a tank of 1000ml that meant 500ml of water and 500ml of developer. I just poured the developer in the cup until it reached the 500ml mark, more or less.
Then I switched to Ilford Ilfotec HC. The dilution was of 1+31, and that meant something around 30ml per 1000ml of working solution. I bought some small measuring cups for this (similar to these), although you can use a syringe as well (like this one).
Thermometer
In order to get the chemicals at the right temperature, you'll need... yup, a thermometer.
For the first months, I used this digital thermometer for aquariums and terrariums but I never really liked using it. It used batteries and it didn't like getting wet.
I switched to a cooking thermometer, like those that you stick in the turkey during Thanksgiving. It worked so much better! Just make sure that it's long enough that it doesn't sink in your measuring jar. I bought mine at a grocery store, but I found this one on Amazon that should work just fine.
Here in Spain, I opted for a Paterson thermometer. A little bit more expensive ($30), hopefully more accurate.
Chemicals: the developer
Arguably the most important thing you need to develop your own film, besides the film itself, are the chemicals.
This post is about developing black and white film, which means you'll need just two types of chemicals: developer and fixer.
I mentioned some developers above: Kodak D76 and Ilford Ilfotec HC. You can find literally dozens and dozens of developers online, each one with different characteristics.
To choose one, I'd do this: go to the massive dev chart, select the film stocks you'll be shooting the most, and then look at the tables to see the different developing times for each developer. I usually look for a reasonable time, not too fast (less than 4 minutes would stress me out), not too slow (more than 15 minutes starts to get tiring).
I've used just two, so far:
- Kodak D76. I started with this one. It comes in a powder and you have to make the working solution mixing it with hot, boiling water. A gallon of product might last 10-15 rolls of film, so I found myself having to make more developer very often, and let me tell you... handling the powder is not fun (and also, you have to wait a few hours until the developer has cooled down). As a developer, it works just fine and it's affordable, but I wouldn't recommend powder developers anymore.
- Ilford Ilfotec HC. More expensive than Kodak D76, a bottle of 1 liter should be enough to develop 50-60 rolls of 120. Unlike D76, the developer comes in a liquid concentrated form, you just have to dilute it with water. I used a dilution of 1+31 most of the time, that meant around 32ml of developer for the big Paterson tank (2 rolls of 120) or 16ml for the small one (1 roll of 120). I used the small measuring cups for these small amounts.
I decided to try a new developer here in Europe, one I've been wanting to try for a while: Rodinal. I will let you know how I like -or dislike- it.
Chemicals: the fixer
I don't use a stop bath between the developer and the fixer, I just pour tap water in the tank for a minute to stop the developing. And so far, it's worked just fine.
I've used multiple fixers as well:
- Kodak Fixer. Packaged the same way as D76, it comes in a powder and you have to mix it in a jug or large bottle before using it. It takes the fixer around 10 minutes, so it wasn't the fastest either. I didn't like it.
- Photographers' Formulary TF-4. I loved this fixer. It comes in liquid form that you have to mix with room temperature water, and it's ready to go almost right away. It's much faster than Kodak's (around 3-4 minutes) and it works perfectly fine. Totally recommend.
I couldn't find Photographers' Formulary here in Europe, so I bought a bottle of Ilford Rapid Fixer. Again, I'll let you know how it goes with this fixer, but there shouldn't be any problems.
Chemicals: photo flo
Even though I said you only need two chemicals to develop black and white film, I'd also recommend using a photo-flo solution. I like Kodak's Photo-Flo.
This is optional and many people don't use it, I might not even need it myself, but it's very cheap and lasts forever so I might as well use it.
It wasn't part of my initial darkroom when I got started and I was getting some water spots and other weird stuff on my negatives. I don't know if it was the photo-flo or I just got better at developing and drying my film, but I never got them again. I keep using photo-flo, just in case.
Drying your film
I use regular hangers like this one and hang my film in the shower, preferably after taking a shower and overnight.
The bathroom is the perfect place to hang your film to dry, since the moisture should eliminate a lot of the dust that otherwise would be flying around.
I've learned that the most important aspect about hanging your film is putting some weight at the bottom of the roll.
I use regular wooden clothespins for both hanging the negatives and putting some weight -I use quite a few of them for the latter, but I'm considering buying metallic, heavier clamps like these ones.
Another useful trick to dry your film is to use a salad spinner. Yes, a salad spinner. Put your reel with your negatives still loaded and spin it a few times to get rid of much of the water. The negatives will dry much faster... and better. It can also be used to dry your reels after you wash them (remember to wash them every time!).
Scanner: Epson v550
Once our negatives have dried, the next step is to scan them.
I had the Epson v600 in the US. It was an OK scanner, I liked the results, but not so much the speed at which is scanned.
Almost everything related to electronics is more expensive here in Europe, so instead of buying the v600 again (250 euros here vs the $200 I paid in the US) I went for the Epson v550 (207 euros / $170 in the US).
On paper, it looks pretty much the same. I will let you know if that's true after using it for a while.
Archiving our negatives
The last step is to archive our negatives. There plenty of options, but I totally recommend Print File's solutions: they are a bit more expensive than others but they work very good.
They have sleeves for 35mm, 120 film and even large format 4x5.
As for a binder to keep these sleeves in, I have no doubt recommending Beseler' binder box.
Conclusion
This list might seem like a lot... because it is. You need some space at home to store all this stuff, and a place to develop the film (bathroom or kitchen will work).
At first, it can be a big investment. I bought all of this for around 300 euros, not including the chemicals. After that first purchase though, you'll only need film and more chemicals when you run out of them.
You'll also need to invest time: developing and scanning every photo you take is not a fast process.
At the end though, this workflow is very rewarding and I love shooting film, even more than the first day.
See also
- How much does it cost to shoot medium format film? My Bronica SQ-Ai numbers
- Shooting film: 2017 in numbers
- I just purchased $500 worth of film for the road trip of a lifetime
- 7 Bronica SQ-Ai Shooting Tips
- 6 reasons why you should use a mirrorless digital camera to meter for your film photos
- Bulk Loading Film: why I'm going to stop doing it


